Creating a Webhook
A webhook is the connection between your TradingView alerts and your Amabit trading account. Each webhook has a unique URL with a secret token and its own configuration for how signals are processed.
Step 1: Open the TradingView Signals Page

- In the top navigation bar, hover over Agents and click Signals
- The TradingView Signals page opens with your existing webhooks
- Click New Signal
Step 2: Configure the Webhook
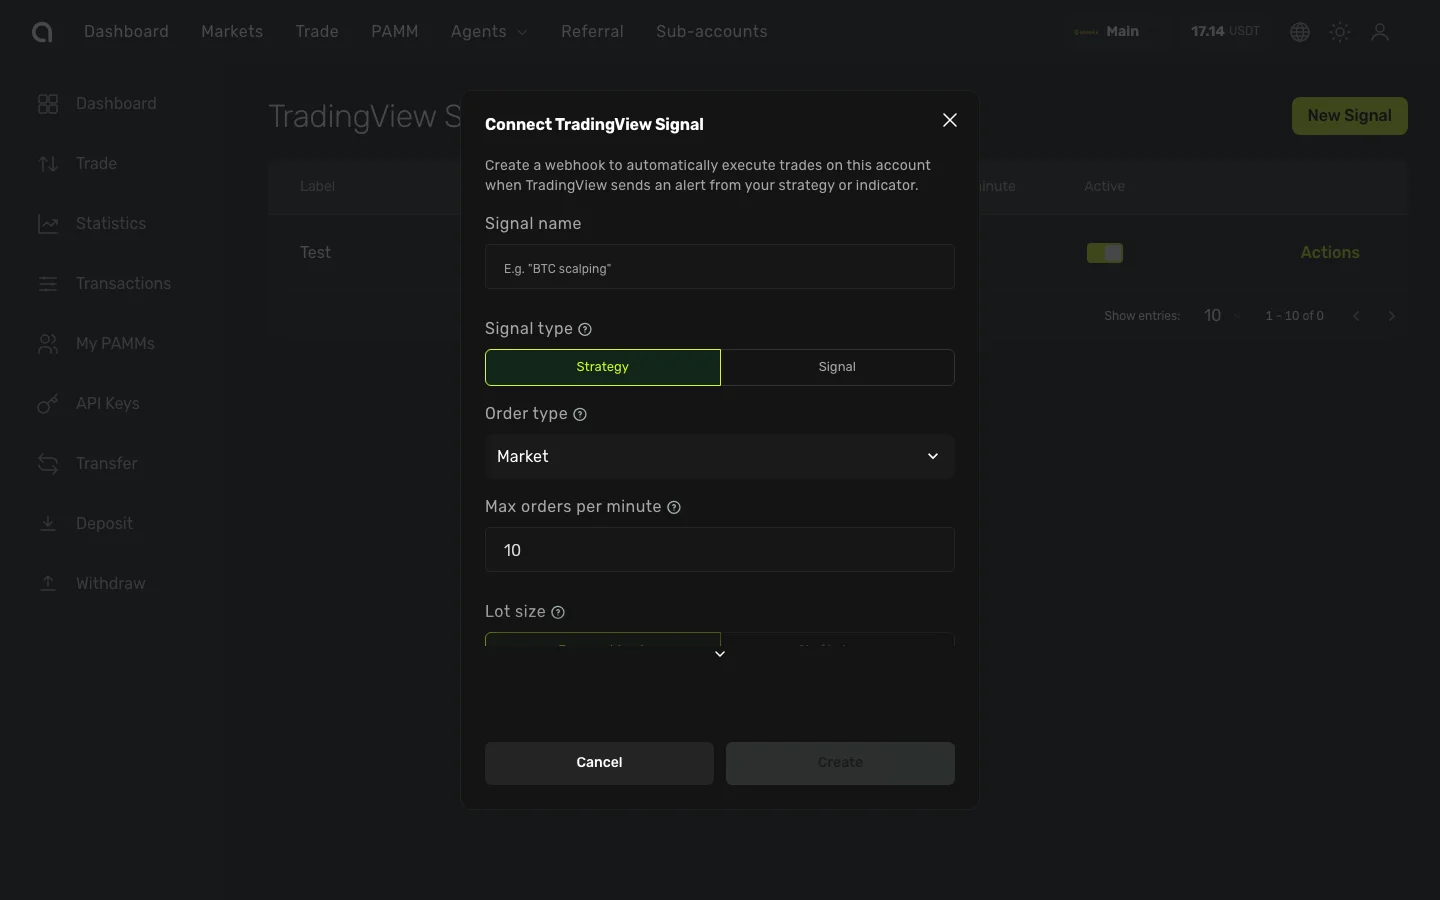
The creation dialog has the following fields:
Label
Give your webhook a descriptive name (e.g., "BTC Long Strategy", "ETH Scalper"). This helps you identify webhooks when you have multiple ones. Required field, 1–100 characters.
Signal Mode
| Mode | Best for | TP/SL in Amabit |
|---|---|---|
| Strategy | TradingView strategies with strategy.entry() / strategy.close() | No — handled by your strategy code |
| Signal | Manual alerts or indicators that only signal entry direction | Yes — up to 5 TP + 5 SL + trailing stop |
Order Type
| Type | Description |
|---|---|
| Market | Executes immediately at the current market price. Best for most use cases |
| Limit | Uses the price field from the TradingView payload. May not fill if the price moves |
Trade Mode (Futures accounts only)
| Mode | Description |
|---|---|
| Cross Margin | Shared margin across all positions. Lower liquidation risk, but losses can affect your full balance |
| Isolated Margin | Separate margin for each position. Better risk isolation — only the allocated margin is at risk |
Position Side (Hedge Mode futures only)
If your futures account uses Hedge Mode, you must specify which side this webhook handles:
- LONG — This webhook processes only long position signals
- SHORT — This webhook processes only short position signals
WARNING
In Hedge Mode, you need two separate webhooks — one for LONG and one for SHORT. Each gets its own URL configured in a separate TradingView alert. See Futures & Hedge Mode Signals for details.
Rate Limit
Maximum orders per minute (1–60). Protects against accidental duplicate signals.
- 10 — Recommended for most strategies
- Up to 30 — For high-frequency scalping
- 1 — For very slow strategies (e.g., daily signals)
Lot Size
How the trade quantity is determined:
| Mode | Description |
|---|---|
| From Webhook | Uses the quantity value from the TradingView payload |
| Custom % of Balance | Uses a fixed percentage of your account balance (0.1%–100%). Ignores the quantity in the payload |
Custom % of Balance is useful when:
- Your TradingView alert doesn't calculate position size
- You want consistent position sizing relative to your account
- You're using the same alert on accounts with different balances
Risk Management (Signal Mode only)
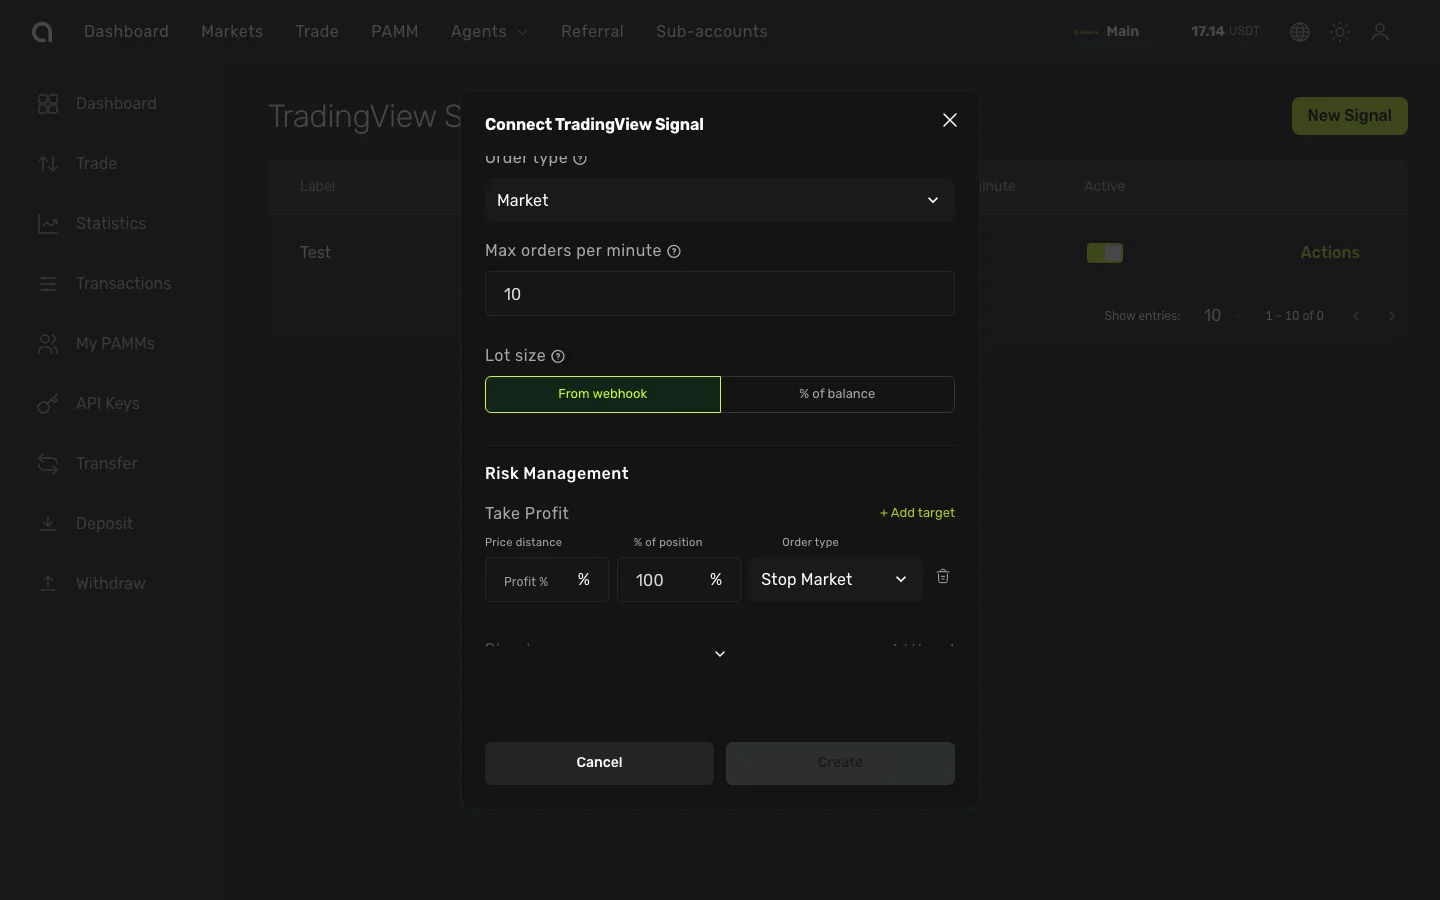
When Signal Mode is selected, additional risk management fields appear:
Take-Profit targets — Up to 5 levels. Each target has:
- Profit % — Price distance from entry (0.01%–1000%)
- Close % — Percentage of position to close at this level (1%–100%)
- Order Type — Stop-Market or Stop-Limit
Stop-Loss targets — Up to 5 levels. Same fields as TP.
Trailing Stop — Enable/disable with a callback rate (0.1%–50%)
The total Close % across all TP targets cannot exceed 100%. Same for SL targets.
Detailed risk management guide →
Step 3: Save and Copy the URL
- Click Create to save the webhook
- The webhook URL is displayed — it looks like:
https://api.amabit.io/webhooks/tradingview/a1b2c3d4... - Copy the URL immediately
Save your webhook URL
The URL contains a 64-character secret token that is displayed only once. It cannot be retrieved later. If you lose it, you must delete the webhook and create a new one.
After Creation
You can also open the Setup Guide at any time from the Actions menu on your webhook — it shows the webhook URL and payload templates.
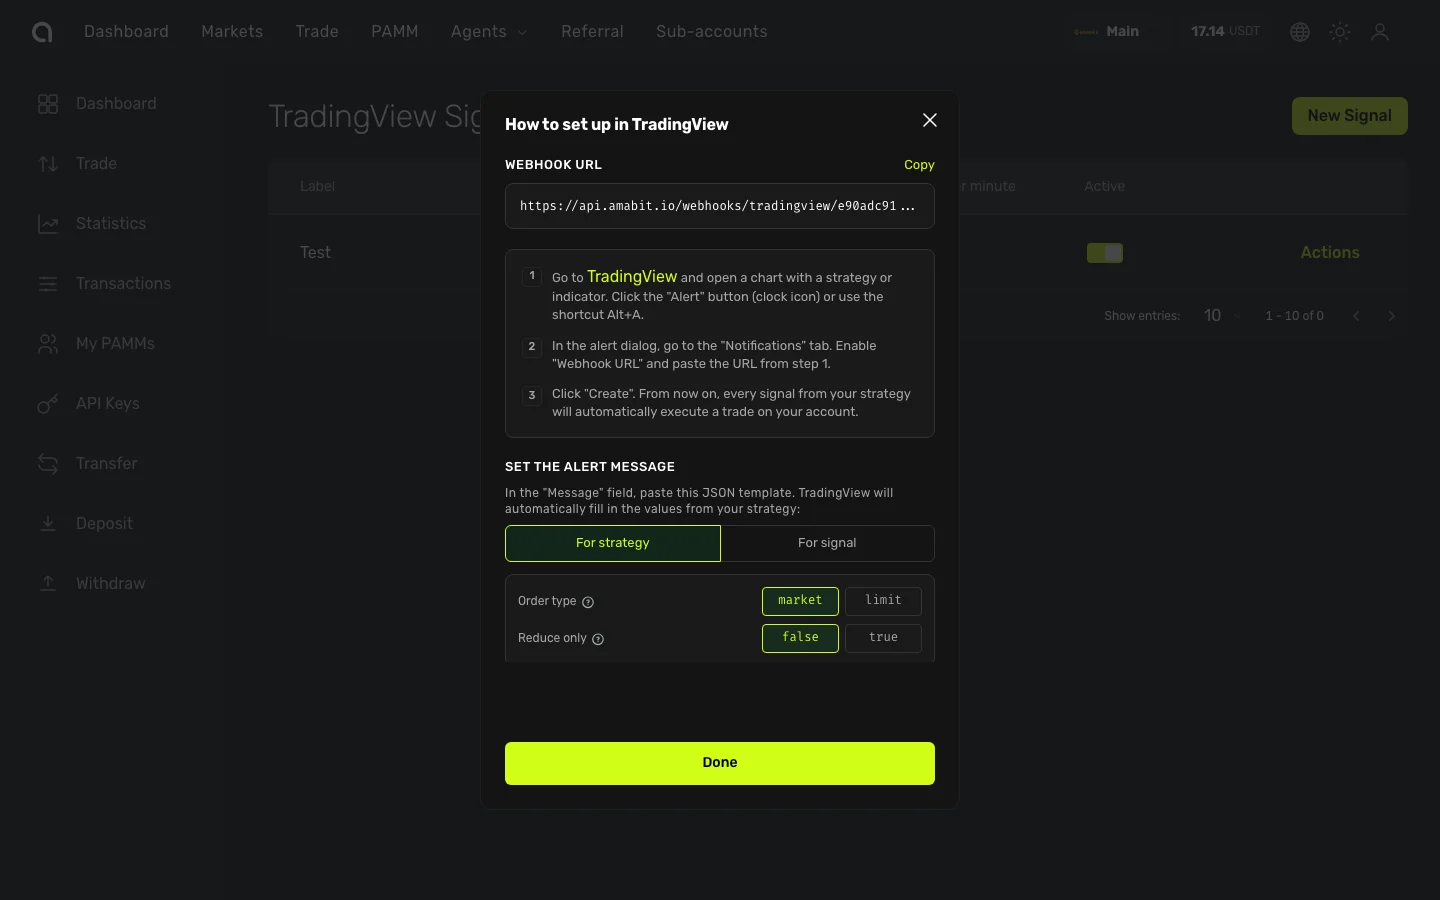
- Set up the TradingView alert — paste the webhook URL and configure the payload
- Choose the right payload format — use the correct template for your signal mode
- Monitor the logs — verify the first signals execute correctly
Managing Webhooks
From the Webhooks page, you can:
- Edit — Modify any setting (label, signal mode, order type, TP/SL, etc.)
- Enable/Disable — Toggle a webhook on or off without deleting it
- Delete — Permanently remove a webhook and its URL
- View Logs — See execution history, errors, and timing for each signal